Move 1 in detail
Shown below are figures to help you visualize what the steps of Move 1 involve.
|
Move 1: U-1 F U L-1 U L U-1 F2 |
|
|
|
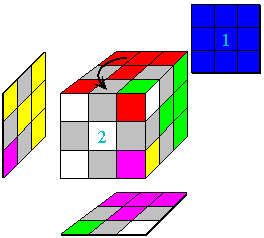
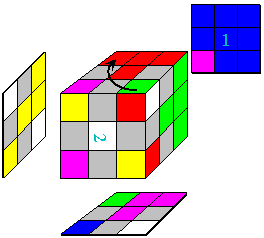
| U-1: Rotate the top counterclockwise | F: Rotate the front clockwise |
|
|
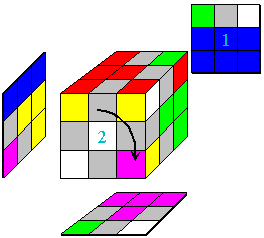
| U: Rotate the top clockwise | L-1: Rotate the left side counterclockwise |
|
|
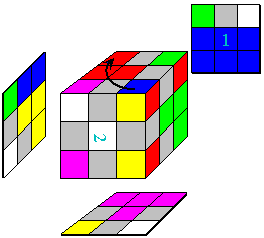
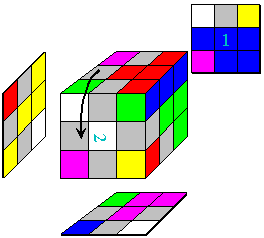
| U: Rotate the top clockwise | L: Rotate the left side clockwise |

|
|
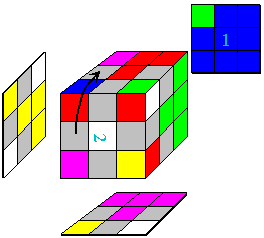
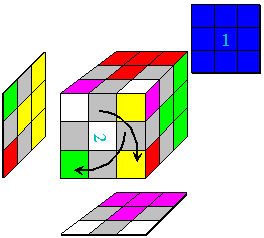
| U-1: Rotate the top counterclockwise | F2: Rotate the front clockwise twice |

|
|
|
The move is complete, and has swapped the bottom-front corner pieces. Notice that it also changed the orientation of the top-front corner pieces, but they are still in the correct location. We'll fix their orientation in Step 3. |
|