 |  
 |
 | 
 |
 |
 |
 |
|
 |  
 
|
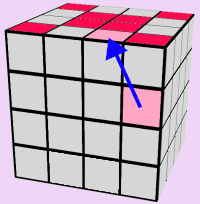
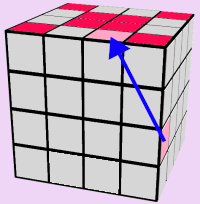
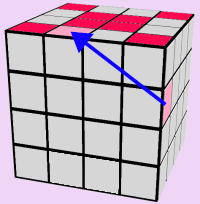
TOP/BOTTOM EDGES: RED FACE
Let's start by completing the Red Edges. The premise for this step is to find and move all appropriate edges, from the two center rows, up onto the Red Side of the cube.
Use the 5 images below to assist you in solving the entire Red Face of the cube. If you run out of pieces on the two center rows:
|
|
|
|
|
|
|
|
|
|
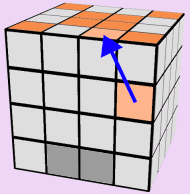
ORANGE FACE:
Now that the Red Face of the cube is finished, lets flip the cube over and finish the Orange Side.
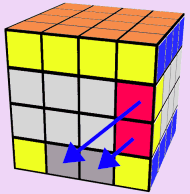
Unfortunately fixing the Orange Side will actually temporarily mess up two of your completed Red Edges that you just finished placing. That's okay though, because we will soon put them back.
When you used steps 1 - 4 above the process successfully moved your piece into place, but it had another, probably unnoticed effect. It actually messed up the pieces in the Dark Gray positions (see images below). We didn't really care before, since we were not concerned with the Orange Edges yet.
We need to sacrifice a pair of finished Red Edges. This will allow us to finish the entire Orange side of the cube at which time we will put the Red Pair back in place.
Use the 5 images below to assist you in solving the entire Orange Face of the cube. If you run out of pieces on the two center rows:
 |
|
 |
|
 |
|
 |
|
 |
|
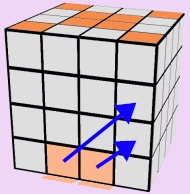
Finally, the Orange side is now complete, and the Red Side is missing two Edges. One more step and we can put those two Red Pieces in place.
If you find that the two remaining Red Edges are in BOTH the Second and Third Layer, match your cube to the samples in Step 1 and Step 2 and follow the appropriate step to finish the Red Side. Again, the colors shown are not relevant, just the move itself is important.
 |
|
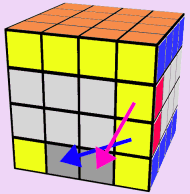 | |
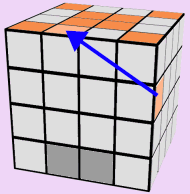
LAST TWO RED EDGES ARE ON THE SAME LAYER
Our goal here is to move the last two Red Edges onto two separate
layers. Position one of the Red/Yellow Edges on the Left Side
of the Face of the cube so that the other Red/Yellow Edge is in
one of the two light-red positions as shown. Match your cube up
to the following two scenarios and perform whichever process needs
completing.
 | 
|
 |
|
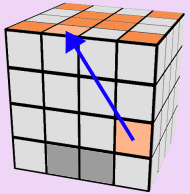
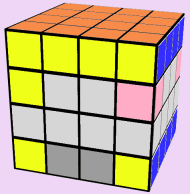
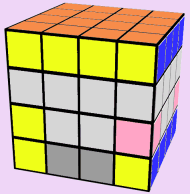
A RED EDGE IS ALREADY ON THE BOTTOM